The world is full of great ideas, and never before has it been easier to turn those ideas into real, physical products. The thrill of holding something in your hands which you created is something quite special.
Here at Ponoko we love helping everyday people make extraordinary things and we relish our part in the renewed ‘maker movement’ which has taken off over the past few years.
To help you become a part of it too, we have drawn up ten steps to creating a successful custom product. We hope they’ll help to inspire you to start making – and hope to hear about your experiences of doing so!
1. Create a clear design brief for your product
The best thing you can start with is a very clear design brief, or outline. The key questions here are “Why?”, “Who?” and “What?”.
Firstly, identify the problem your product will solve, and the constraints you want to work within. For instance, instead of deciding you want to make a set of shelves – start with the fact you need to organize your books, and the constraint is that it needs to fit between your desk and your bed. This will widen the scope of what you may create, and ensure that it’s meeting a clear need.
Clarifying who you’re making the product for will help you in a multitude of ways – from how you will make it in the beginning through to how you will promote it to others.
2. Get the idea out of your head
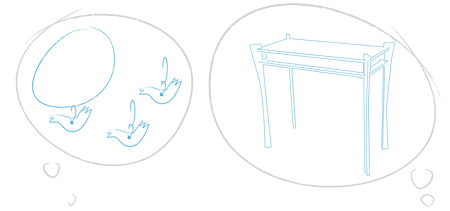
Picasso said “an idea is a point of departure and no more. As soon as you elaborate it, it becomes transformed by thought.” The first step from the intangible to the tangible is to just get the idea out of your head in whatever form you can.
An obvious way to do this is simply sketch it out on paper. Don’t panic too much about your drawing skills – you just want to start working out the shape, dimensions and details required in your final object. Record any describing words that accompany your sketch – color, texture, transparency etc.
Remember that you don’t need to settle for the first design that you sketch out. The more alternatives you explore, the stronger the idea you finally use will be.
3. Choose your materials and components
Selecting materials is where you get to unleash your creativity and think about bringing your product ever-closer to reality. Often the material you need will be determined by what fabrication method you use, but whether you’re laser-cutting, CNC routing or knitting, elements such as color, texture and thickness will play an integral part to the overall impact of your design.
Deciding what materials to use will also provide vital dimensions for use when finalizing your designs. This is particularly important if you’re considering making a 3D object out of flat sheets which slot together.
It’s also important to work out what other components will be required to complete your product. For instance you may have a series of pendants laser cut, and then locate silver chains and rings to turn them into necklaces. Alternatively, you may 3D Print an enclosure, and separately source the electronics to make a custom MP3 Player.
It’s best to know the physical properties of these components before you get too far along the design process. The size of these components is likely to influence the design of your product. For instance, the size of the bolt you want to use will determine the size of the hole you need to design.
If you’re using a Digital Fabrication Service to help make your product, it’s likely they will have a selection of materials available to choose from, such as our Ponoko Material Catalog. Alongside the convenience of sourcing materials and manufacturing from one source, the other advantage here is being able to purchase very small volumes of material at a time – when many suppliers have large minimum orders.
Example Bricks and Mortar Material and Component Sources
Home Depot
Michaels
Example Online Material and Component Sources
McMaster-Carr
SparkFun
4. Choose how your product will be made
How products are made ranges from the hand made to robotic assembly lines that cost millions of dollars. Digitally created designs give you the power and quality of robots at a price closer to something hand made. You can make one offs or have the same file made a million times.
Each possible tool at your disposal, computer-controlled or not, provides you with opportunities and limitations. It’s important to take some time to understand these and make the most of whichever method or methods you choose to use.
Also, just like hand tools, digital design tools require a level of study and practice. If you have the time and patience, your options will increase and you will find your ability to make real things grow broader than you might have imagined.
Finally, you could always find another person to assist you with turning your concept into a makeable design – which we’ll cover in the next step.
Example Do-It-Yourself Locations with Digital Fabrication Tools
TechShop
Hacker Spaces
NYC Resistor
Example Online Digital Fabrication Services
Ponoko
Big Blue Saw
100k Garages
Shapeways
RedEye
i.materialize
5. Finalize your design for the chosen material & method
With your fabrication methods and materials chosen, you can start turning those early sketches into a makeable design. The key things here are dimensions, shape and embellishments (such as printed or engraved elements).
“But I’m not a designer!” you might say. At this stage you could employ the services of another person to aid you in turning your concept into a final, makeable design. There are a number of routes you can take to crowdsource this support – such as our Ponoko ID service or crowdSPRING.
If you go with this option, be sure your design brief and sketches are as absolutely clear as possible. What will be created for you by someone else will only ever be as good as the brief you provide them with.
If you’re going down the Digital Fabrication route yourself, it’s now time to create your digital design file. If you’re using an online service for your manufacturing, they will likely have clear instructions as to how your file must be formatted – and perhaps even tips and tricks to help you get it right.
The type of file you create will depend on the type of machine and process you’ll be using. Here are a few examples of software you can use to make it:
Example Paid Software
Adobe Illustrator (2D)
Solidworks (3D)
Alibre (3D)
Example Free Software
Inkscape (2D)
Sketchup (3D)
Blender (3D)
6. Make a physical prototype of your design
Prototyping is an vital part of the design process, and it’s possible you’ll need to make several versions of your product before you have it perfected. Once you have a tangible prototype to examine, you can then make adjustments as needed and gain confidence that you’re on the right track. The key thing here is to try and avoid making something 100 times if you’re not pretty darn sure it’s going to look the way you hope.
There are lots of ways to keep the cost of prototyping down. If creating a digital design, the cheapest initial option is to simply print your file out onto paper at 100% scale. One danger when working at a variety of zoom levels is not having a clear sense of how large your final product (or the details upon it) will be. For 3D designs, this would naturally be an elevation – but whatever the case, this will give you a sense of the true scale of your design.
Next, you can prototype only the elements most likely to not work out. When creating designs with interlocking parts, consider whether you can prototype ONLY the interlocking areas. When considering using a large volume of engraving or etching, first try out just a few sample pieces using a variety of weights. This way if what you were planning fails, it can fail on a small cheap scale, rather than making a full prototype to when there were only a few elements at risk.
Also, you can try out a design on an alternate cheap material. When it comes to laser-cutting, for instance, cardboard is a great option for prototyping early interlocking designs. It provides a cheap and fast way to evaluate the form and feel of your object. You can also make adjustments with a knife or scissors later to add details you might have missed in the first version. Then to effectively evaluate the strength and structure of your design you would need to use the materials you intend to manufacture with.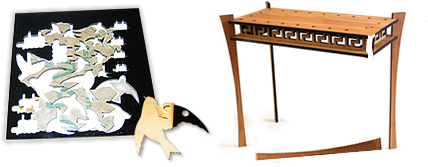
7. Assess the outcome of your prototype and adjust your design
The completion of the first ‘physical draft’ of your product is always an exciting moment. It may not have turned out exactly as you’d hoped, but here it is – your idea in physical form. There are few things more satisfying than being able to hold something in your hands which was once only in your head.
Now is the time to have a good look at the parts that have worked well and identify any elements that might need adjusting. Has the material you chose worked as expected? Does it fit together firmly? Will it be strong enough for its intended use?
Presented with the real physical outcome of your design, you can now adjust it to better align with what you had intended. The result of this revised design will naturally be a new prototype, followed by another round of assessment.
You’ll want to continue revising your design until you’re confident in the quality of your product. Once you’ve got it right, you’re ready to start selling it.
8. Set a wholesale and retail price for your product
Determining the price of your product is a crucial step if you’re looking to successfully market and sell your design. It is important to have a clear idea of all the costs involved for you. Obvious ones include material, manufacturing and shipping costs, but you also must take into account packaging, instructions and extra parts.
You’ll also want to assess how much you want to make per-unit if you are selling your items wholesale, and double this figure to find a retail price. You can find an example breakdown below.
It can also be worthwhile doing a bit of research and investigating your competition to inform your pricing – or at least gain an understanding of what similar products might sell for in the marketplace. This will also inform which markets you’ll aim it at.
- The breakdown
- Example Cost
- Manufacturing cost to me
- $18
- Materials cost to me
- $9
- Shipping cost to me
- $5
- Extra parts cost to me
- $4
- Assembly instructions cost to me
- $1
- Packaging cost to me
- $2
- Misc costs to me
- $1
- Total cost to me
- $40
- My creative fee (20% margin)
- $10
- Wholesale price
- $50
- The retail fee (50% margin)
- $50
- Retail price
- $100
9. Make your product available for purchase
Just as it’s now easier than ever to create a custom product, there are also a host of services for making it possible for others to pay you for it. Even if you’re planning on selling your product offline, also offering it through an online shop will open up markets which were never possible in the past.
Example Online Marketplaces
Ponoko Showroom
Etsy
Supermarket
shopflick
DaWanda
felt.
When selling your product online, make sure you take high-quality photos and write useful and imaginative descriptions of your product. Describe what it is made of, what the dimensions are and what it feels like. Don’t be afraid to share a bit about yourself too, so that customers can identify with you as a real person.
We really cannot emphasize enough the importance of crisp, well lit, high quality photos. It’s these images which will catch the eye of your potential online customers, who will assume that the quality of your photos reflect the quality of your product.
With an online shop presence established, you can start exploring other options for selling your designs in person – firm in the knowledge that you can always provide a card with a link to where people can buy your product online.
10. Promote your product to your target market
We’ve found that that there are two key things shared by designers who have created successful products through Ponoko:
- They have a product people want.
- They work hard to promote their product and drive potential wholesale and retail customers to their showroom or web page where the product can be purchased.
While online marketplaces provide you with the capacity to close a sale, they are definitely not enough on their own. Sadly it is not a case of “list it and the customers will come.” You’ll need to find avenues to promote your product and start making sales.
One good option is promoting your product in person. Markets, fairs and gift shows are an excellent forum for showcasing your design as they guarantee great foot traffic and can connect you directly with potential wholesale buyers.
When it comes to online promotion, it’s very important to decide your target market. These days there are numerous web-based communities for all kinds of special interests. The more specific you can be about who will want your product, the more likely it is that you can gain visibility in those communities.
Think about your unique story, and how you can tell it to your desired audience. You’re now a part of the maker movement – you’ve taken an idea and made it real. You’ve refined and tested it, and now you’re offering it to the world. Fantastic!
