Or how to avoid “smudgy yucky“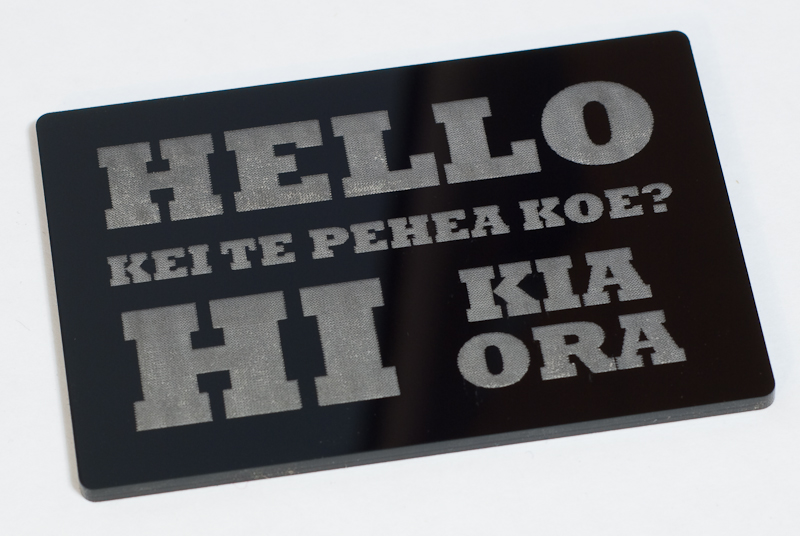 Burn marks are an inherent part of the laser cutting process – we are cutting things with a highly focused beam of fire after all. There are some tricks to minimizing this issue for different materials, and this post deals with acrylic.
Most of the acrylic sheets we use come with protective paper on both sides. It’s possible for us to leave this paper on when making your design, which we tend to do where it will not interfere with your engraving. The main downside to this is needing to peel paper off both sides of the acrylic, which can be time consuming and tricky if your design is intricate.
Generally our rule is: cut with paper on both sides if there is no raster engraving in the design, or if all raster engraving is of the heavy variety. Heavy raster engraving burns through the paper without any trouble, as does heavy and medium vector engraving. If the file has medium or light raster engraving, however, we will remove the protective paper from the top of the material unless otherwise requested.
It is possible to use medium engraving through the paper, but due to the dot matrix nature of the raster engraving not all the paper is burned away. A slightly sticky residue may be left on the plastic if you ask for this option – which may need to be cleaned off before you use it.
Below are some typical examples of what you get when laser cutting acrylic. It should be noted that it is most obvious on black hence using it as the example material. Also the images have been zoomed in to great detail and emphasizes the effects more than might be obvious to the naked eye.
Cutting – Paper Left On vs Paper Removed
 On the left through the paper and on the right without paper. The right shows a clear example of the smudgy burn marks that are left on the acrylic after cutting. Clearly the shapes cut through the paper is cleaner than not.
Heavy Raster Engraving – Paper Left On vs Paper Removed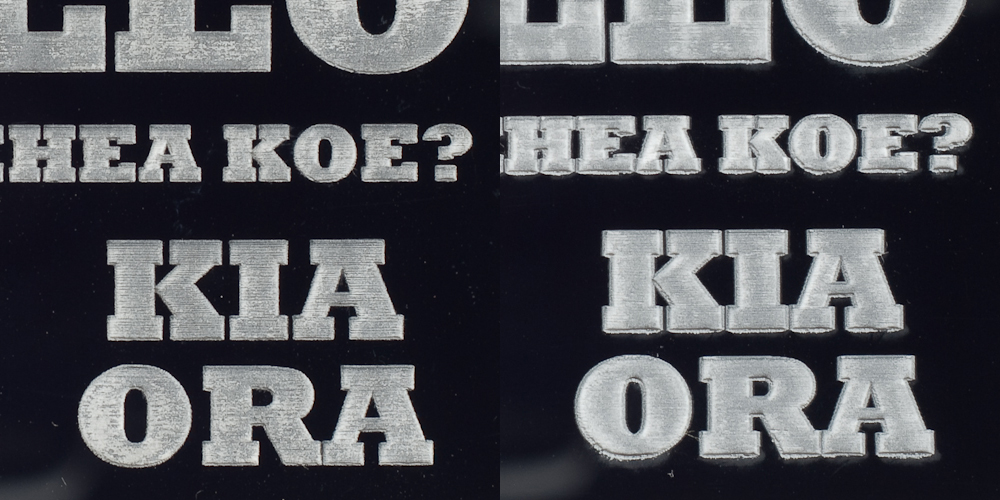 On the left through the paper and on the right without paper. You can see that engraving through the paper produces a crisper result. The vaporized acrylic builds up around the outside of the letters when the paper is not use and produces this slightly ‘inflated’ look. This would probably polish off should you have the desire to do so.
Medium Raster Engraving – Paper Left On vs Paper Removed
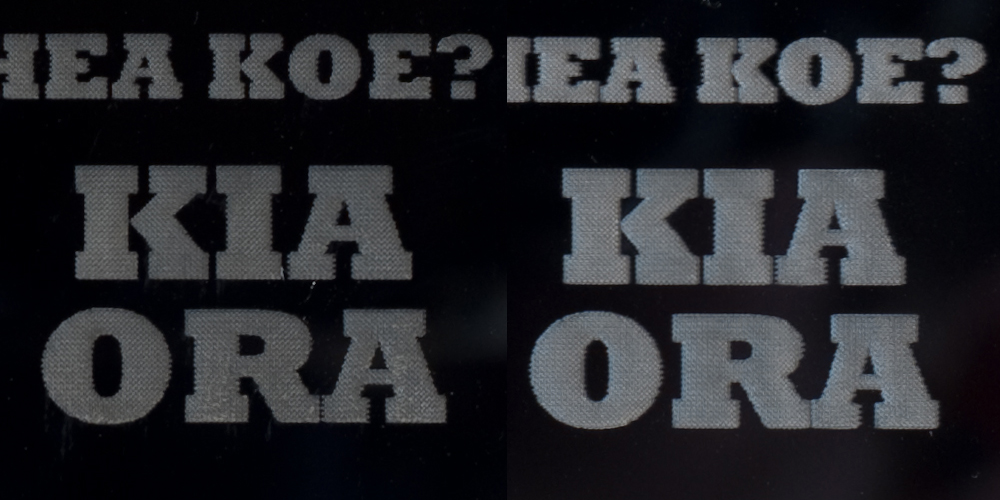 On the left through the paper and on the right without paper. Again engraving through the paper is a little crisper in the letter forms, but as mentioned earlier there may be sticky residue left over from the adhesive of the paper.
So what does all this mean?
If you want us to leave the paper on, you should only use heavy raster engraving. If you use medium or light raster engraving, we will make your design with the paper removed.
If you would like to specify how you want your job cut, make a note in the Special Shipping instructions.
Other tips for engraving & cleaning acrylic:
How to improve your engraving results – Part 1
How to improve your engraving results – Part 2
Tips for cleaning acrylic
Kudos to @deleifd and @skruff for the awesome type design.
3 Comments
Helpful stuff, thanks Dan.
It’d be cool to see your take on the paper mask on wood and plastics when it comes to paint filling raster areas.
For sure. That’ll be a post for another day.
Thanks for the additional information, Dan. I tend to use multiple, different raster and vector settings on each piece of art (to give it depth) so my question would be, how do the different raster and vector settings look stacked next to each other with the paper on and with the paper off?
Example: Heavy raster next to medium raster next to light raster. I know from personal experience that with the paper off, the gradient effect can be quite stunning and beautiful. If you leave the paper on, will the gradient between the three still be as striking?
I should find out when I get my next batch of art but thought others might be interested as well (I can post some pictures of my example once I have them).
Comments are closed.